Blog
How to Make DIY Earrings: Creative Ideas for Beginners
Making your own earrings is a fun, creative, and cost-effective way to express your personal style. Whether you’re looking for a unique accessory or a heartfelt gift, DIY earrings are the perfect project for beginners. With just a few tools and materials, you can create designs that range from minimalist to bold statement pieces.
In this guide, we’ll walk you through how to make DIY earrings, including the basic tools you’ll need, easy techniques to get started, and creative ideas for inspiration.
1. Why Make Your Own Earrings?
Creating DIY earrings offers many benefits:

1.1. Personal Expression
- Tailor your designs to suit your taste, outfit, or mood.
- Incorporate your favorite colors, materials, or symbols for a one-of-a-kind piece.
1.2. Cost-Effective
- Making earrings yourself is often cheaper than buying store-bought designs.
- You can repurpose old or unused jewelry into new creations.
1.3. Perfect for Gifting
- Handmade earrings make thoughtful, personalized gifts for friends and family.
2. Tools and Materials You’ll Need
Before you start, gather these basic tools and materials:
2.1. Tools
- Flat-Nose Pliers: For bending and holding wires.
- Round-Nose Pliers: Essential for creating loops and curves in wire.
- Wire Cutters: To trim excess wire.
- Tweezers: Useful for handling small beads and findings.
2.2. Materials
- Earring Hooks or Stud Posts: The foundation of your earrings.
- Jump Rings: Small metal rings for attaching components.
- Headpins and Eye Pins: Thin wires for beads and charms.
- Beads: Glass, plastic, or gemstone beads in various sizes and colors.
- Headpins and Eye Pins: Thin wires for beads and charms.
- Beads: Glass, plastic, or gemstone beads in various sizes and colors.
- Charms: Pre-made decorative pieces like leaves, stars, or hearts.
- Wire: Choose flexible craft wire, usually 20-24 gauge.
- Chains: For creating dangling effects.
- Glue: Jewelry glue or E6000 for attaching non-wire elements.
3. Basic DIY Earring Techniques
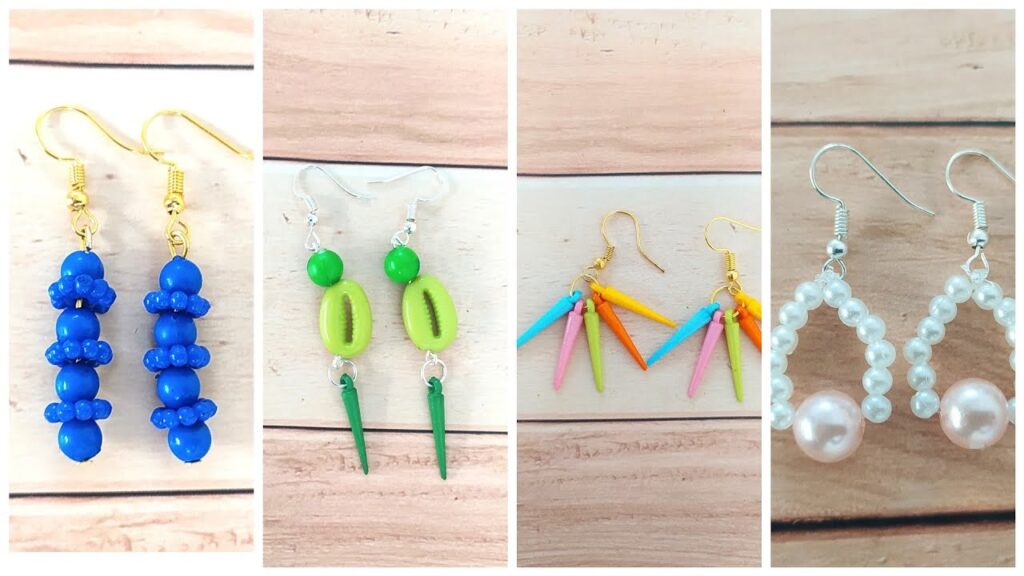
3.1. Making a Simple Beaded Drop Earring
- Slide a bead onto a headpin.
- Use round-nose pliers to create a loop at the top of the headpin.
- Attach the loop to an earring hook using a jump ring.
- Close the jump ring securely with flat-nose pliers.
3.2. Creating a Wire Wrapped Earring
- Cut a piece of wire (about 4 inches).
- Slide a bead onto the wire.
- Hold the wire above the bead and twist it into a loop using round-nose pliers.
- Wrap the remaining wire around the base of the loop for a decorative finish.
- Attach the wire-wrapped bead to an earring hook or chain.
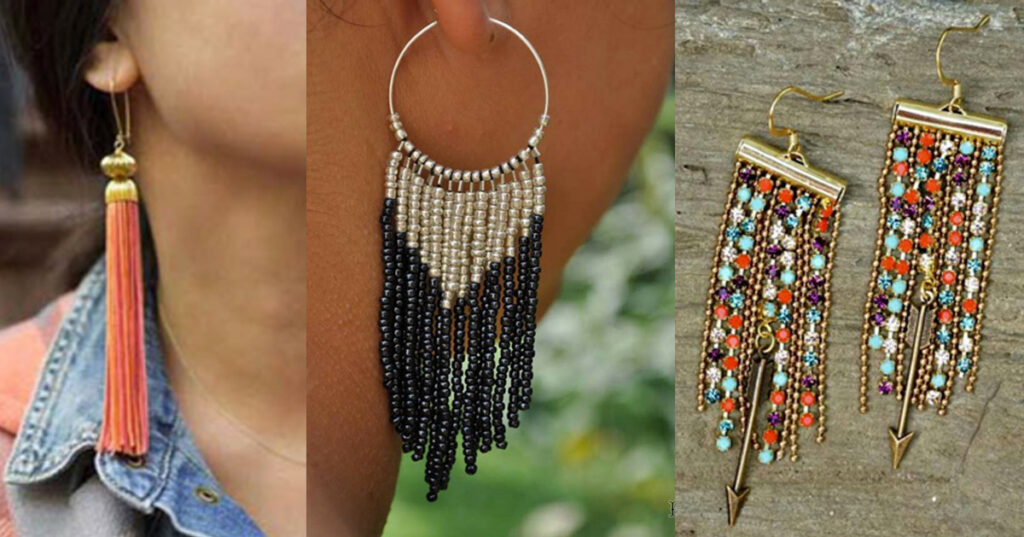
3.3. Making Tassel Earrings
- Cut several strands of embroidery thread or yarn to your desired length.
- Fold the threads in half and tie them tightly near the folded end.
- Attach the tied end to a jump ring or stud post using jewelry glue.
- Trim the tassel ends evenly for a polished look.
4. Creative DIY Earring Ideas for Beginners
4.1. Minimalist Wire Earrings
- Bend wire into geometric shapes like triangles, circles, or squares.
- Attach the shapes directly to earring hooks for a sleek, modern design.
4.2. Beaded Hoop Earrings
- Slide small beads onto a pre-formed hoop or flexible wire.
- Use contrasting colors or patterns for a playful touch.
- Secure the beads in place with small knots or loops.
4.3. Button Earrings
- Repurpose old buttons by attaching them to stud posts with glue.
- Choose vintage buttons for a unique, nostalgic look.
4.4. Resin Earrings
- Mix resin and hardener according to the instructions.
- Pour the mixture into silicone molds.
- Add dried flowers, glitter, or small charms for decoration.
- Allow the resin to cure, then attach earring hooks or posts.
4.5. Leather or Fabric Earrings
- Cut leather or fabric into shapes like feathers, leaves, or teardrops.
- Punch a small hole at the top and attach an earring hook with a jump ring.
4.6. Clay Earrings
- Roll polymer clay into your desired shape (e.g., circles, flowers, or abstract forms).
- Use a toothpick to create a small hole for the hook.
- Bake the clay according to the package instructions.
- Attach the clay piece to an earring hook with a jump ring.
4.7. Nature-Inspired Earrings
- Use small seashells, dried flowers, or stones.
- Attach these natural elements to hooks or chains for an organic, earthy design.
- Use small seashells, dried flowers, or stones.
- Attach these natural elements to hooks or chains for an organic, earthy design.
5. Tips for Successful DIY Earrings

5.1. Start Simple
- Begin with easy designs like single bead drops or studs before attempting complex techniques.
5.2. Experiment with Colors and Materials
- Mix different materials like beads, wood, and fabric for a unique look.
- Use a color wheel for inspiration when combining colors.
5.3. Prioritize Comfort
- Ensure earrings are lightweight and use hypoallergenic materials like stainless steel or sterling silver for hooks and posts.
5.4. Practice with Wire
- Practice making loops and bends with inexpensive wire before using high-quality materials.
6. Where to Buy Materials for DIY Earrings
6.1. Craft Stores
- Stores like Michaels, Joann, or Hobby Lobby offer a wide range of beads, wires, and tools.
6.2. Online Retailers
- Websites like Etsy, Amazon, or Beebeecraft provide affordable and unique materials.
6.3. Local Markets or Thrift Stores
- Find vintage or unconventional pieces to repurpose into earrings.
7. Caring for Your Handmade Earrings
7.1. Store Properly
- Use a jewelry organizer to keep earrings tangle-free and protected from scratches.
7.2. Clean Regularly
- Wipe with a soft cloth or jewelry cleaner to maintain shine.
7.3. Handle with Care
- Avoid exposing earrings to water or harsh chemicals to preserve their materials.
8. Turning Your Hobby into a Business
If you enjoy making DIY earrings, consider turning your hobby into a small business:
- Sell Locally: Set up a booth at craft fairs or farmers’ markets.
- Sell Online: Use platforms like Etsy, eBay, or your own website.
- Social Media: Showcase your designs on Instagram or Pinterest to attract customers.
Conclusion
Making your own earrings is a rewarding and creative activity that allows you to showcase your style and craftsmanship. With a few basic tools, materials, With a few basic tools, materials, and techniques, you can create beautiful and unique earrings for yourself or as thoughtful gifts.
Start with simple designs and gradually experiment with different materials and styles as you gain confidence. The possibilities are endless, and each piece you create is a reflection of your creativity and personality. Happy crafting!


